
Love your Gut!
It is an age old fact that a clean intestinal tract is what keeps a person healthy and strong. However the unhealthy lifestyle and poor choice of foods seems to have taken a toll on the intestines of the people these days. No wonder then that most people tend to suffer from various metabolic issues and lifestyle diseases.
Though there are a lot of medicines and treatments to rectify these, letting nature take its course is surely the best idea. This is one of the main reasons why yoga gurus and their followers vouch by Shankprakshalana when it comes to cleansing the gastrointestinal tract. This is one of the best ways to thoroughly cleanse ones intestines in a natural manner without any kind of medical intervention.
The method involves drinking 1 ½ liters of lukewarm water with salt in it and then performing some yoga exercises. Some diet restrictions should also be followed, prior to and after the procedure. Elaborate though this may sound, it flushes out all the wastes from the body and releases blockages.
Remember that this should be practiced in the presence of a yoga guru only.
Prepping Up
A light dinner prior to the day that you plan to practice Shankprakshalana is advisable. Make sure that it does not include any dairy products.
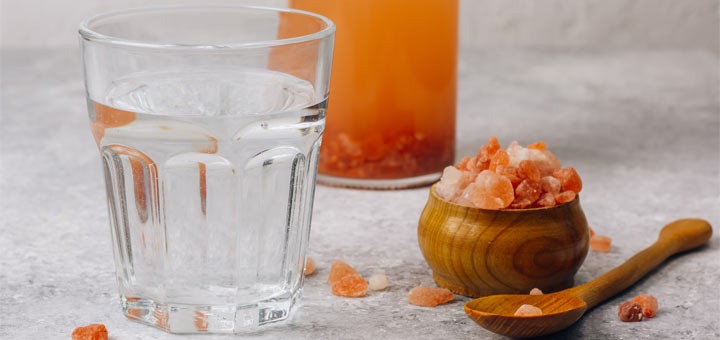
Shankprakshalana should be practiced on empty stomach and preferably early in the morning. Add 2 teaspoons of salt to 1 ½ liter of lukewarm water. You can add juice of 1 ½ lemon to this mixture.
Getting Started
While sitting down, quickly drink 2 glasses of the lukewarm water mixture. This should be followed by 6 yogasanas, each repeated 6 times in one round. The whole process involves two complete rounds of these yoga exercises. It is important to perform the asanas in the same order as described here.
1. Tadasana
- Stand straight with your feet apart.
- Lift your arm towards the front of your body till they are at your shoulder level. Interlock your fingers, palm facing out.
- Raise your hands till they are straight above your head.
- Lift your heels to raise yourself off the ground.
- Hold this position for a few seconds and slowly come back to the original stance.
2. Tiriyak Tadasana
- Stand straight placing your feet apart.
- Raise your hands to bring them in front of your body and up to the shoulder levels.
- Interlock the fingers with palms facing outwards.
- Raise your interlocked hands straight above the head.
- Stretch your body upwards and then bend towards the left without bending your fingers.
- Hold this position for a few seconds and then rise till your body and hands are all in straight line.
- Now slowly bend towards the right and hold this stance for a few seconds.
- Repeat this 6 times.
3. Tiryaka Bhujangasana
- Lie down on the yoga mat, face down, forehead touching the ground and palms by your chest, facing down.
- Make sure that your legs are straight and your toes are stretched back.
- Slowly raise your forehead and bend your neck backwards.
- Bending your right elbow while keeping the left hand straight, twist towards the left while moving your neck in that direction.
- Hold this position for some time and release. Do the same on the right side too.
- Complete 6 such rounds.
4. Udarakarshan
- Squat on the ground such that your legs are 8 inches apart, your knees are bent and the soles touch your buttocks.
- Place your hands on the knees with elbows slightly bent.
- Slowly push your left knee with your left hand towards the right foot without raising the right leg.
- Hold this position for some seconds and then release.
- Repeat the same for the right knee.
5. Kakhpadasana
- Squat just like you did for Udarakarshan.
- Slowly move your left knee forward and place it on the ground.
- Now bend the right knee towards the left foot. Hold this for a few seconds.
- Repeat this the other way round.
Once you have completed 6 repetitions of each of the above asanas, you have completed one round of the exercises. Drink two more glasses of the lukewarm water and repeat another round of these asanas. In case you feel the call of nature, it is perfectly fine to leave an asana and go to the toilet.
After Shankaprakshalana
Completing this whole process can take some time which is why it is advisable that you do not plan anything else for the day. Once you complete the procedure, you need to rest your body in Shavasana at least 1 hour 45 minutes. However, make sure not to sleep for at least 3 hours.
After two hours of performing Shankaprakshalana, you can go ahead and eat homemade Khichdi – a semi liquid mixture of rice, moong dal (aka split green gram) and ghee (clarified butter). No salt should be added to it. It is believed that the three constituents are extremely beneficial in restoring the function of the digestive system.
Following Shankaprakshalana, the body should be given ample rest. It is also advised to eat only Khichdi for the other two meals as well.
Summing up
Shankaprakhshalana can go a long way in cleansing the intestinal tracts and restoring good health, which is why yoga gurus advise its regular practice. However, this is not suitable for pregnant women. People suffering from certain medical conditions should get the advice of a yoga expert before practicing it.
Practiced by yogis since time immemorial, we now know the secret of their health and well being.
Remember, A healthy gut, A healthy life!
Reference Links:
